Zeppelin Bend - How to Join Ropes Like a Pro
Industrial and Electrician Applications
While many ametuers tie in a crappy Flat Overhand Bend and trade professionals usually default to a Sheet Bend or a Fisherman's Knot, the Zeppelin Bend offers specific advantages for heavy-duty electrical installations:
Extending Pulling Lines: When a factory-length pull-rope or mule tape falls short of the next junction box, this bend securely joins two lines without the bulk of a standard knot that might snag on conduit edges.
Jam-Proof Rigging: Unlike a Reef Knot or a Fisherman’s Knot, the Zeppelin will not jam. This is critical when you're working with high-tension pulls that would otherwise require you to cut the rope to get it apart.
Securing Equipment: It is an excellent choice for creating long lashings when securing heavy gear or transformers to a flatbed, as it won't slip in synthetic or slick ropes.
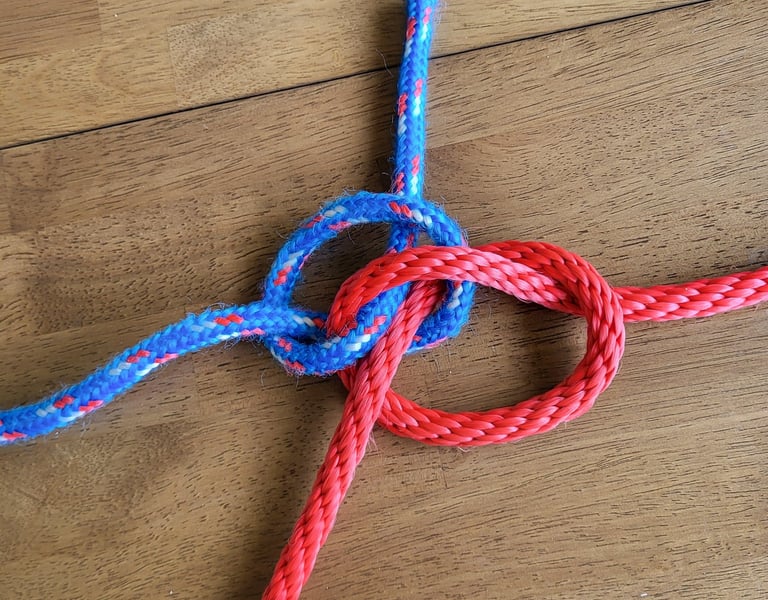
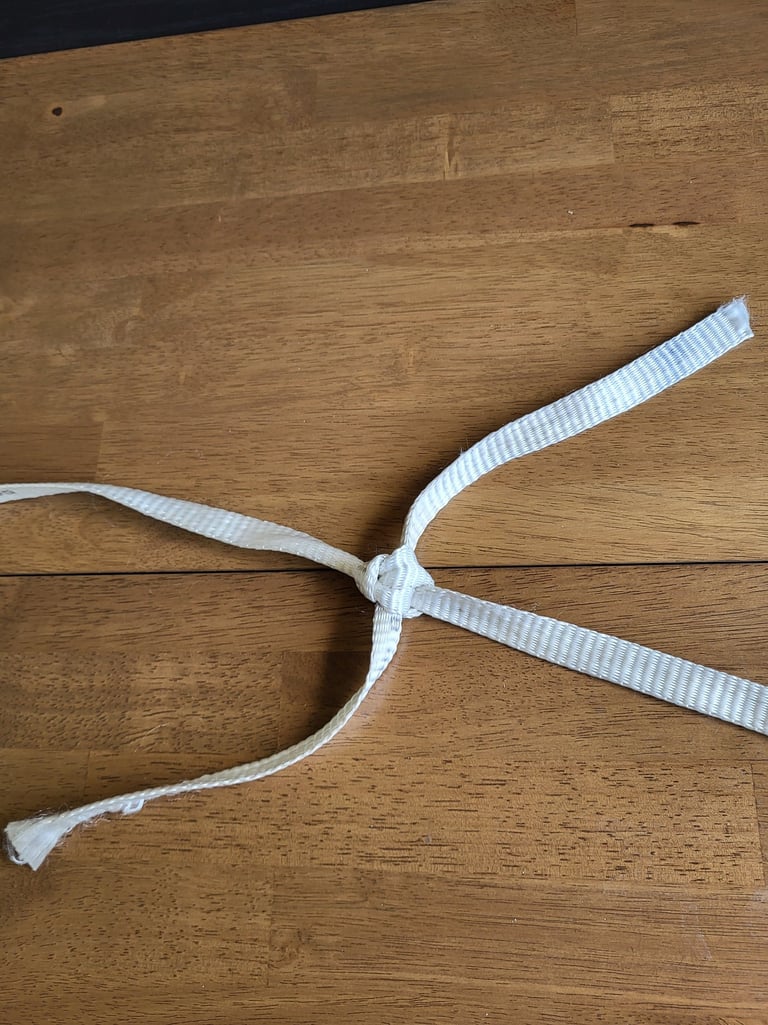
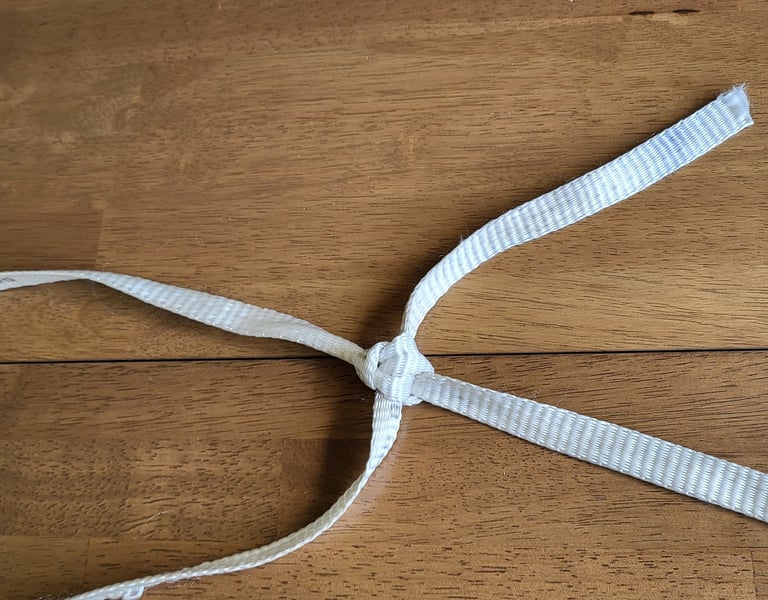
The Zeppelin Bend (also known as the Rosendahl Bend) is widely considered the gold standard for joining two ropes of similar diameter. In the world of industrial electrical work, where tension on a pull-tape or rope can reach extreme levels, most bends tend to "weld" themselves shut, becoming nearly impossible to untie. Even though this bend is simply two interlaced Overhand Knots, The Zeppelin Bend remains perfectly stable under load but stays remarkably easy to shake loose once the tension is released. Its symmetrical design makes it easy to identify at a glance, ensuring that your connection is secure before you start the pull.
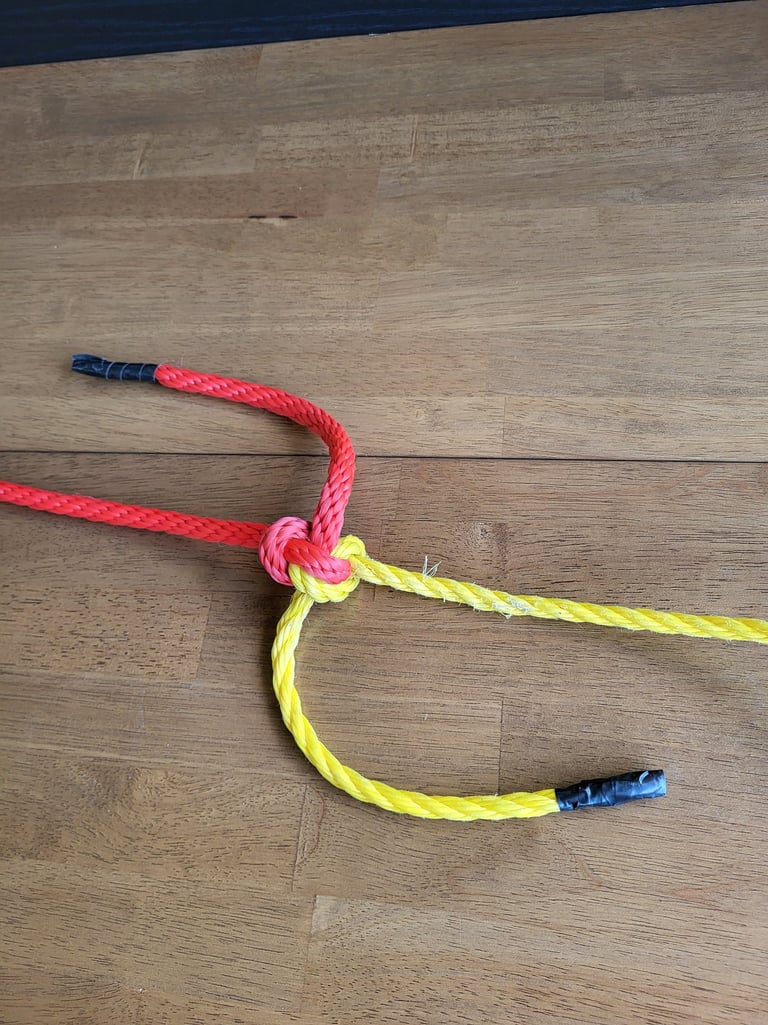
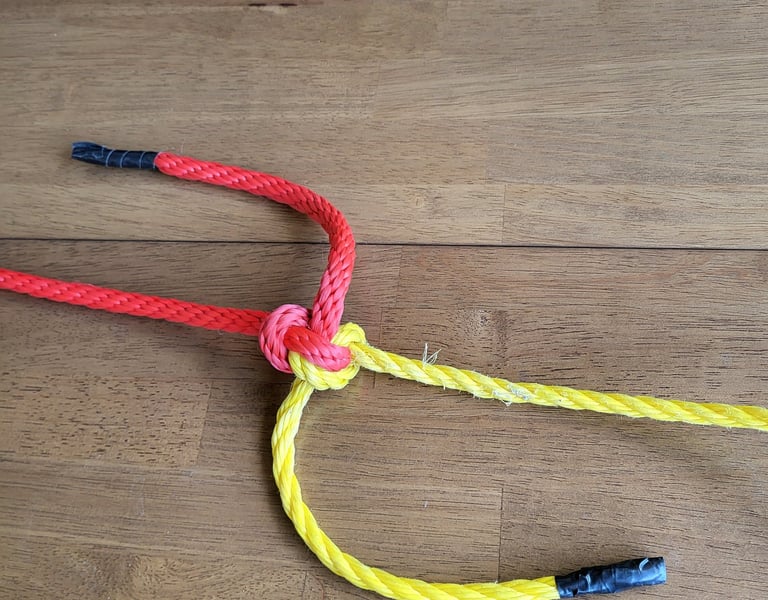
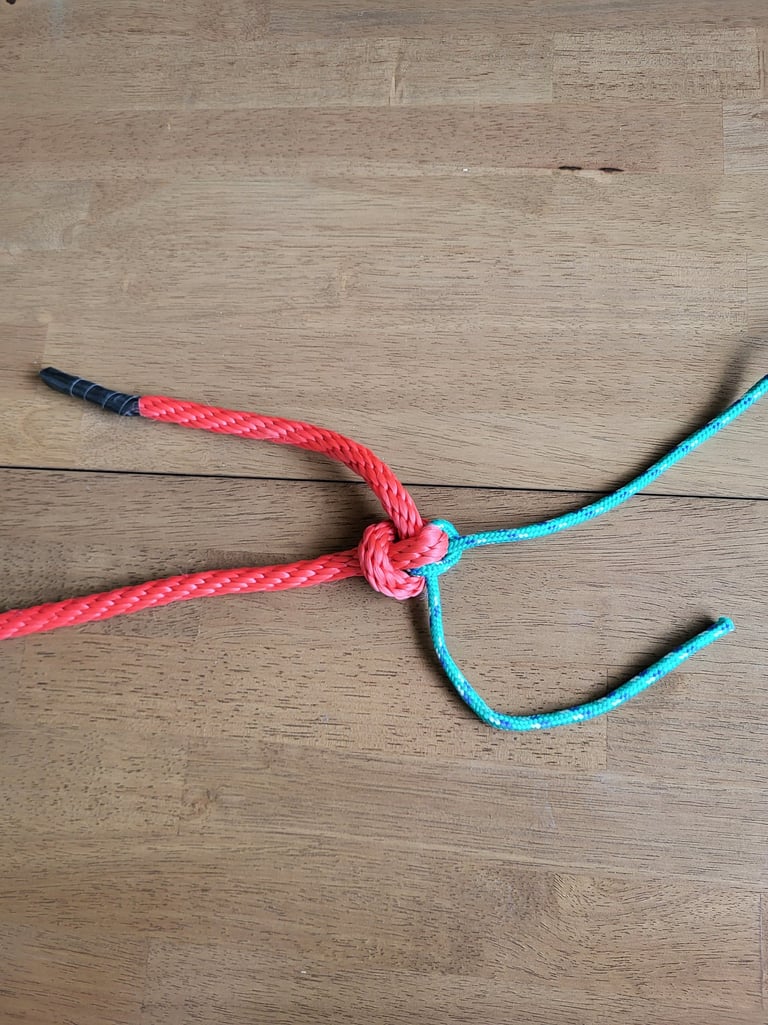
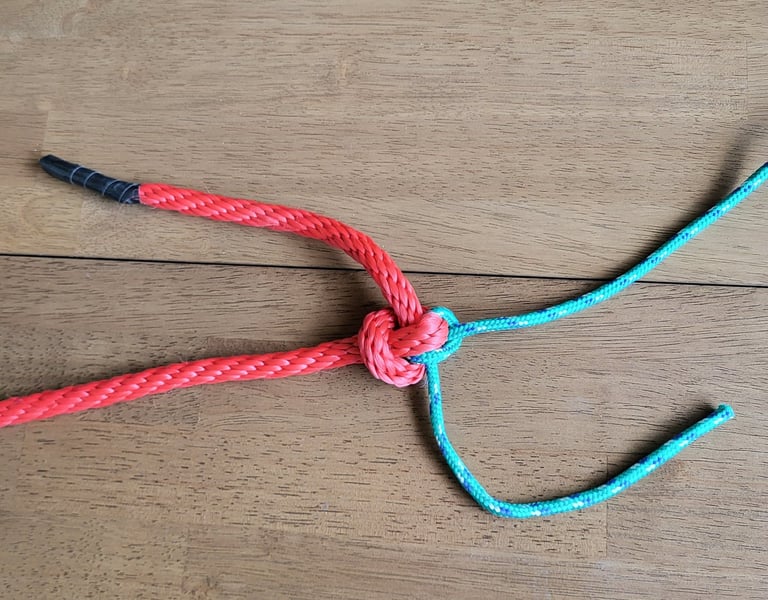
How to Tie the Zeppelin Bend
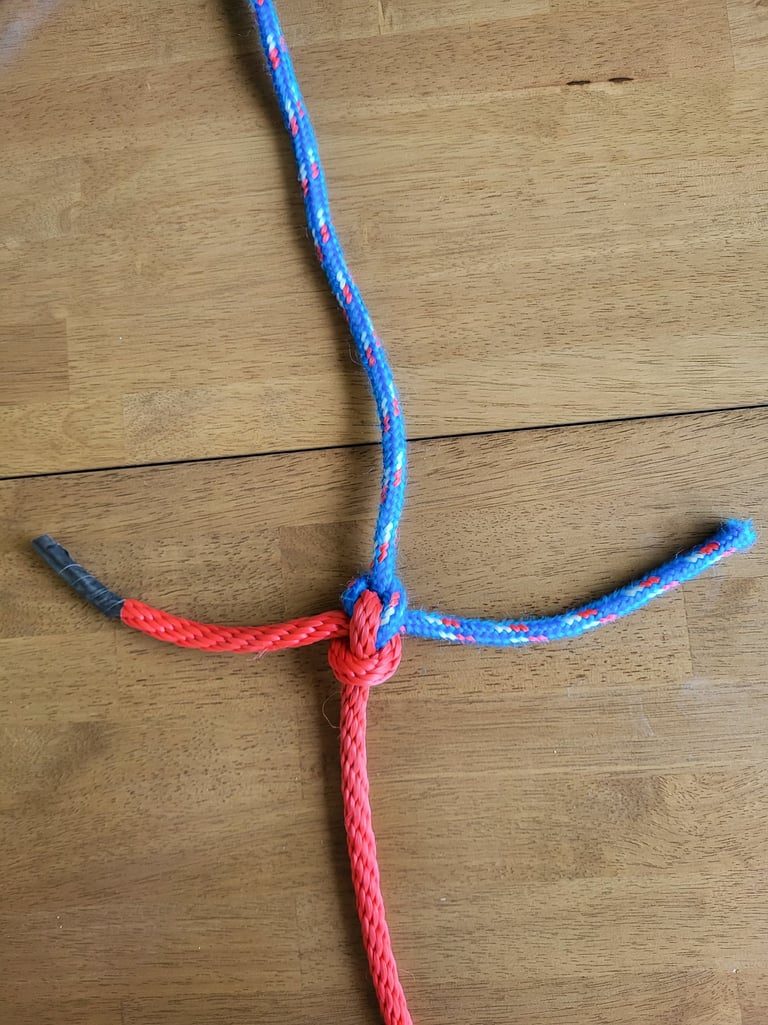
To tie this correctly every time, use the "6 over 9" method to maintain symmetry:
Form the Loops: Take the end of the left-hand rope and form a loop so the tag end sits on top (resembling the number 6). Take the right-hand rope and form a loop so the tag end sits underneath (resembling the number 9).
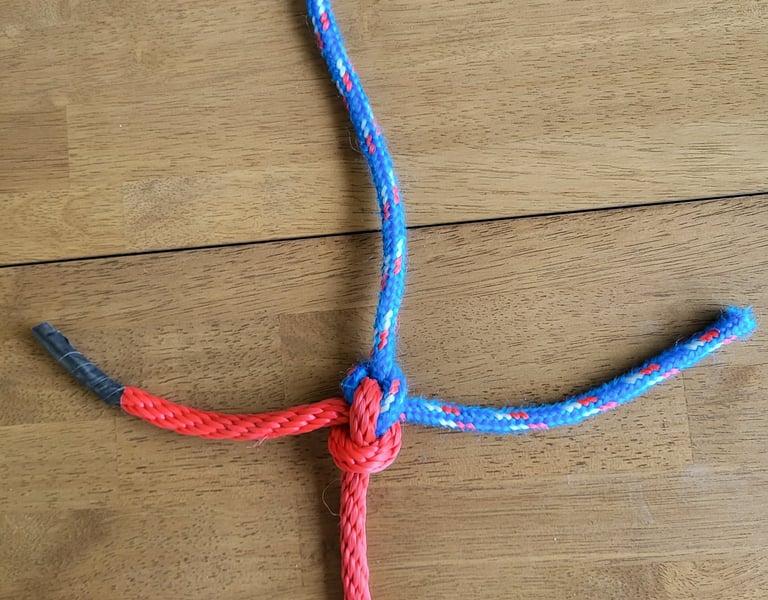
Overlap: Lay the "6" loop directly on top of the "9" loop so the holes overlap.
The Weave: Take the tag end of the top rope (the 6) and tuck it down through the center of both loops.
The Counter-Weave: Take the tag end of the bottom rope (the 9) and tuck it up through the center of both loops.
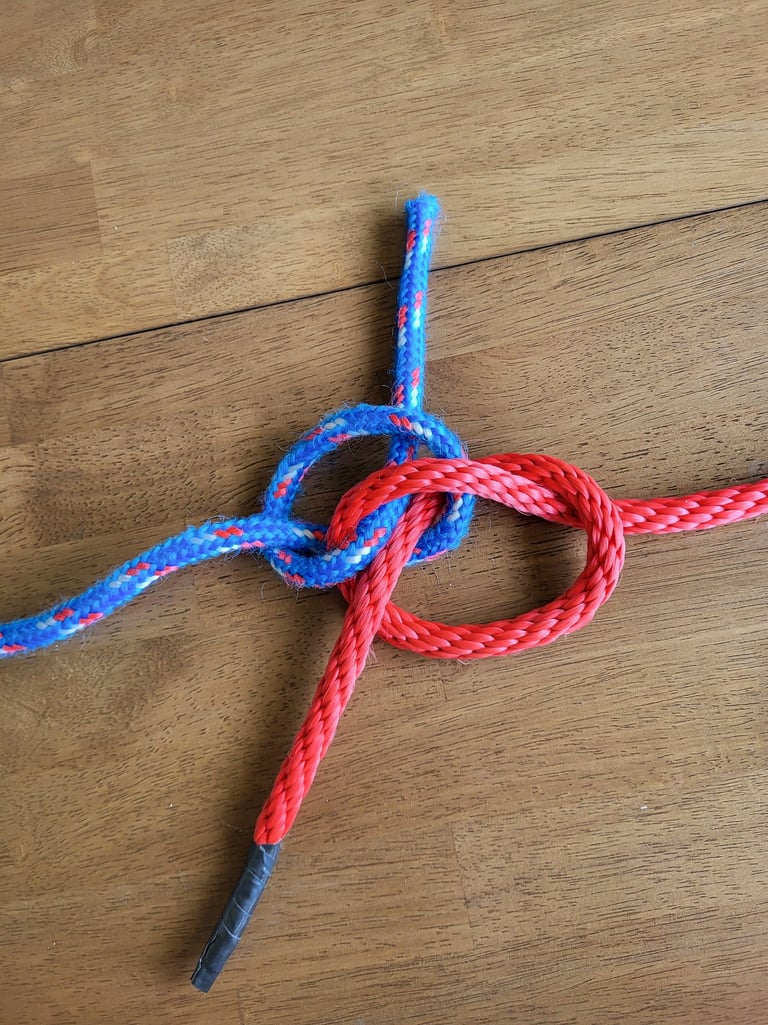
Dress and Set: Pull all four ends—the two standing lines and the two tag ends—simultaneously. The knot should seat into a neat, symmetrical "nest."
History of the Zeppelin Bend
The knot earned its name from Charles Rosendahl, a Vice Admiral in the U.S. Navy who commanded the airship Los Angeles. He insisted on its use for mooring massive Zeppelins because the knot was both incredibly secure against the buffeting of the wind and could be untied instantly by hand when the airship needed to launch. Its reputation for reliability in high-stakes environments transitioned it from the airfield to the maritime and construction industries.
Another great knot for your skillset
Mastering the Zeppelin Bend adds a level of professional rigging to your toolkit that goes beyond the basic knots. It’s a specialized tool for situations where reliability and ease of teardown are equally important. Whether you’re extending a pulling line or securing a load for transport, this bend ensures that your connection is the strongest link in the chain. Now that you've learned about this great bend, check out a useful friction hitch that will help with safely tipping over a heavy piece of switchgear to fit through a tight door frame, the Munter Hitch.
Safety Disclaimer: ⚠️ Material Handling Only
The knots and techniques demonstrated on this site are intended strictly for material handling, wire pulling, and equipment securement. > Never use these hitches and knots for life safety, fall protection, or overhead lifting of loads where a failure could result in injury or death. Always use OSHA-compliant, load-rated hardware (harnesses, shackles, and slings) for critical lifts. Your safety team is there for a reason—consult them for high-risk tasks. Master the craft, stay out of pinch points, respect the load, and live to tie knots another day.
Questions or tips? Reach out anytime. I would love to hear about new knots and techniques.
Check out my YouTube channel for knot tying, rigging tips, and other electrician related tutorials.
© 2025. All rights reserved.
I made this website by myself with Hostinger Website Builder. Try it and start building your idea, today.