Portuguese Bowline Knot - Uses for Electricians
The Portuguese Bowline is a versatile variation of the standard Bowline knot that is particularly useful for securing or pulling objects when you lack a central support point. Its main advantage is the ability to create an adjustable suspension point between two separate tie-off locations.
Key benefits include:
Non-binding: Like the classic bowline, it remains easy to untie even after being subjected to heavy loads.
Adjustable: It allows you to position the force exactly where you need it between two points.
Efficiency: Using the "snap method" allows you to thread the rope through both points first, eliminating the need to guess the required loop size beforehand.
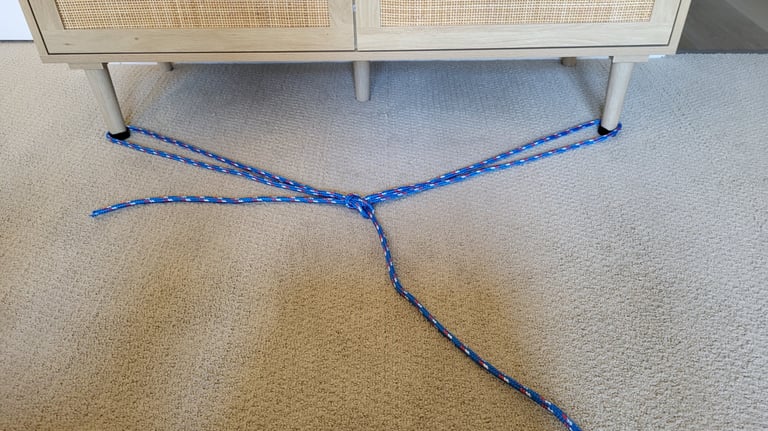
How to Tie a Portuguese Bowline (Snap Method)
The snap method is efficient for threading through two tie-off points without having to pre-calculate the size of your loops.
Thread the first point: Pass the rope through or around your first tie-off point, then twist the line once under the rope to keep the loops straight during tightening.
Thread the second point: Pass the line through the inside of your second tie-off point.
Gather slack: Pull enough slack so the line reaches past the midpoint between the two tie-off points.
Cross the lines: Pull the section of line between the two anchor points and lay it over your standing line.
Form a slip knot: Roll a loop forward on the standing line (past the crossing section), then pull that loop over the crossing section. Pull a bight of the standing line through that loop to create a slip knot.
Finish the bowline: Thread the tag end through the protruding bight.
Tighten: Pull both the standing line and the tag end simultaneously. The bight will slip through the loop to form the finished Portuguese Bowline knot.
Alternative: Loop and Thread Method
If you prefer the traditional Bowline approach, you can also tie this by forming your loops first and threading the tag end through. For a more secure "doubled" version, leave a longer tag end and take an extra turn through the rolled loop before finishing the knot normally.
You can also "pre-tie" a Portuguese Bowline by making two passes through the initial "rabbit hole" and then finish like a regular Bowline. This forms your two adjustable loops. I have yet to find a use for this method in contruction so I wouldn't commit that technique to memory.
⚠️ Safety Reminder: These techniques are intended for material handling only. Never use these knots for life safety or fall protection.
Why Electricians Use the Portuguese Bowline
In industrial electrical work, you rarely have a perfect anchor point exactly where you need it. The Portuguese Bowline is a "problem-solver" knot because of its unique two-loop, adjustable geometry. It is a great tool when used creatively and can help solve otherwise difficult scenarios.
1. Finding the Perfect Balance Point
When you are lifting or moving awkwardly shaped objects—like a large transformer, a motor, or a bundle of heavy-gauge conduit—the center of gravity is rarely in the middle.
The Advantage: Because the two loops of a Portuguese Bowline are adjustable before the knot is fully set, you can shift the weight distribution until the load sits level. This prevents the "tip and slip" that happens with fixed-loop knots.
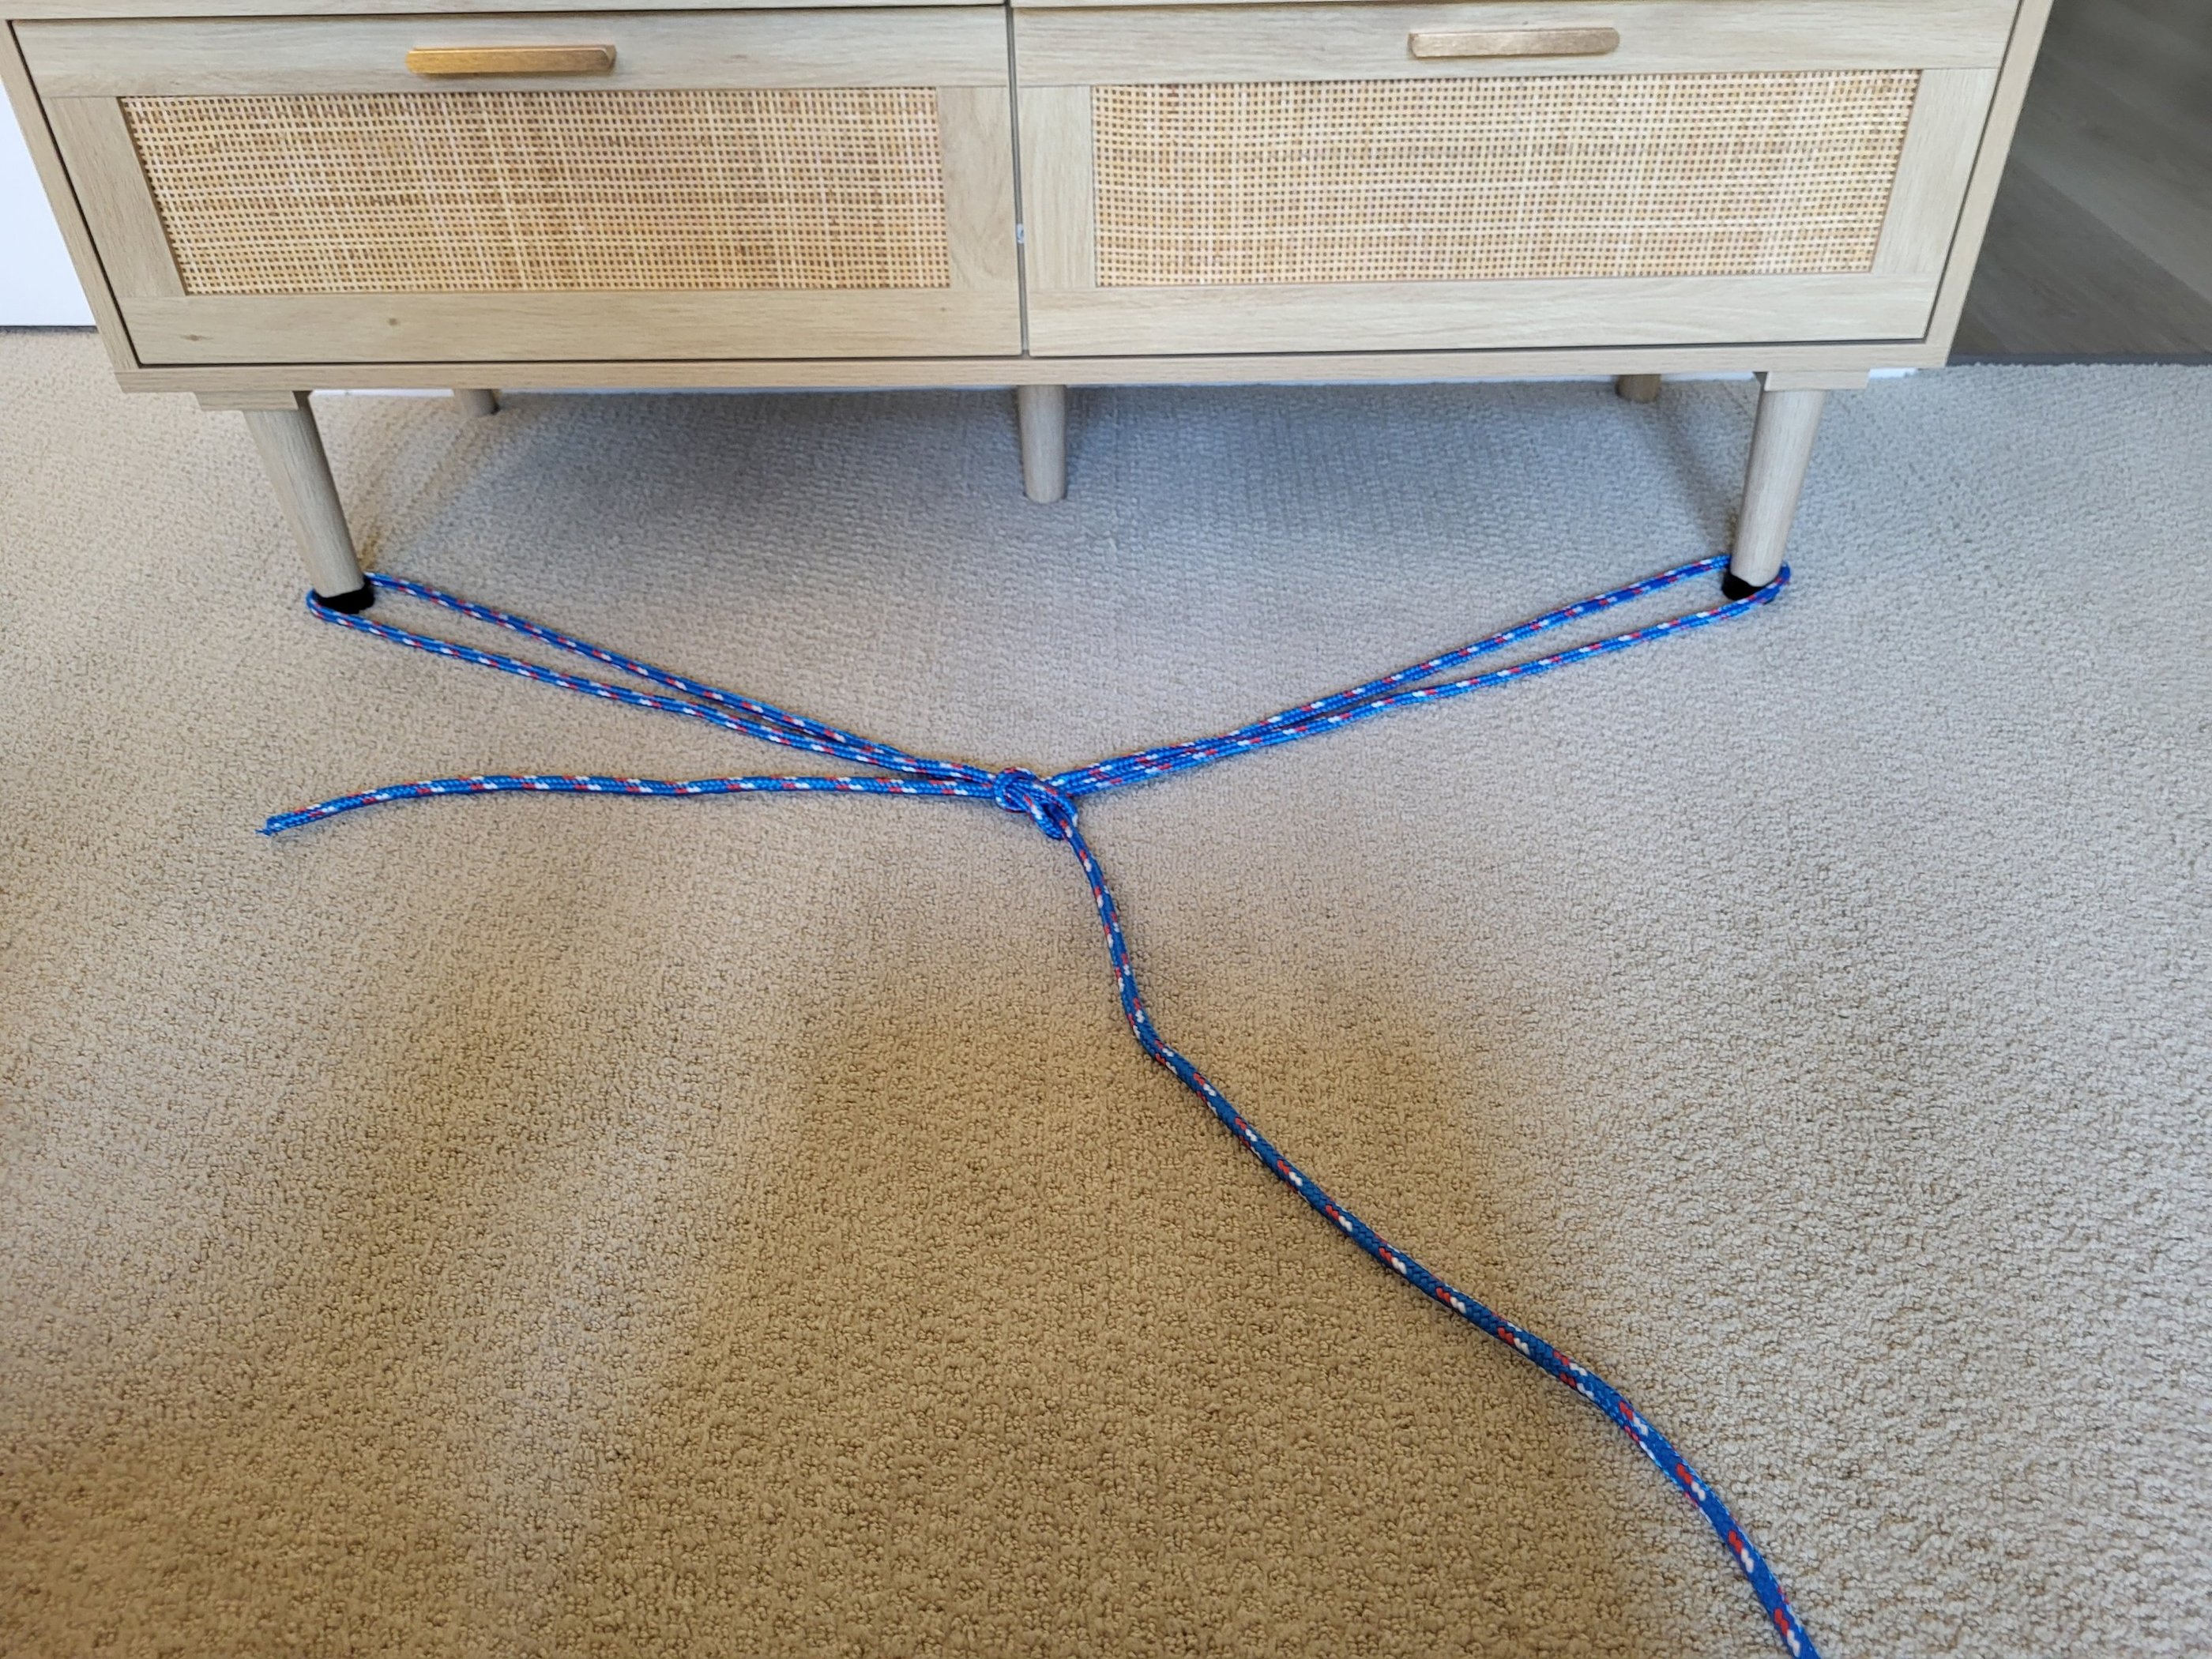
2. Suspending Wire Pulling Wheels In-Line
This is perhaps the most common field application. When you are setting up a heavy pull and there is no direct overhead structure to hang your blocks or wheels:
The Scenario: You have two anchor points (like structural steel or strut) on either side of the pull, but nothing directly in line with the conduit.
The Solution: Run your line between the two side anchors and tie a Portuguese Bowline in the center. You can then suspend your wire pulling wheel from the loops.
The Result: The knot allows you to precisely center the wheel in-line with the pull, even when your anchors are offset.
3. Non-Binding Reliability
Just like a standard bowline, the Portuguese version will not bind. After you’ve put a massive load on the line during a wire pull, you can still untie it easily by "breaking the back" of the knot. You won't need to reach for your linemans to cut the rope.

Pro Tip: I primarily use the Snap Method for this setup. It allows you to thread the rope through your two anchor points first, then "snap" the knot into existence exactly where the wheel needs to hang. No more guessing on loop lengths or re-tying three times to get the height right.
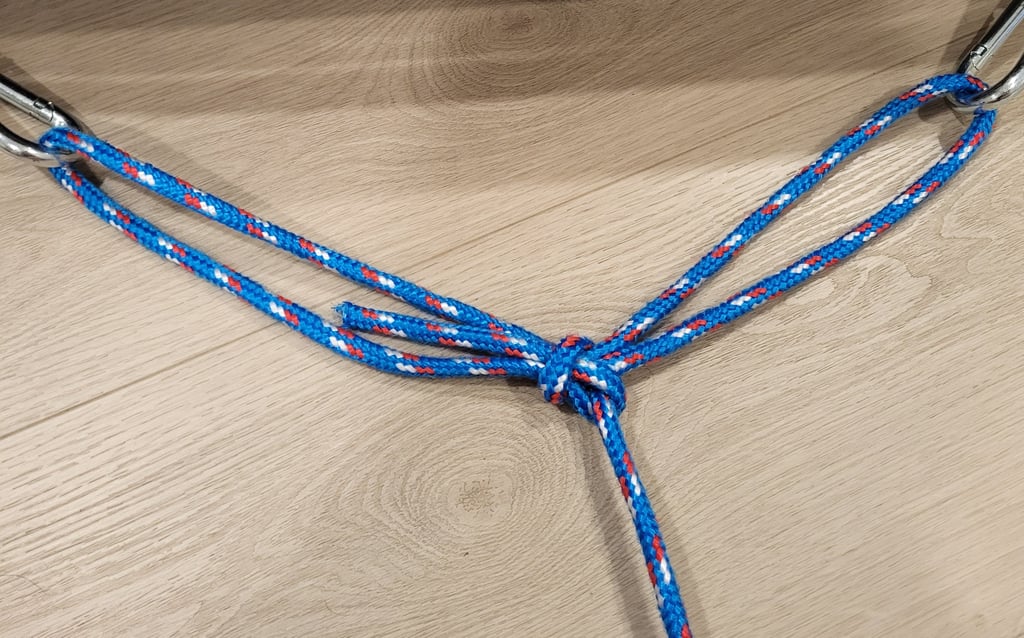
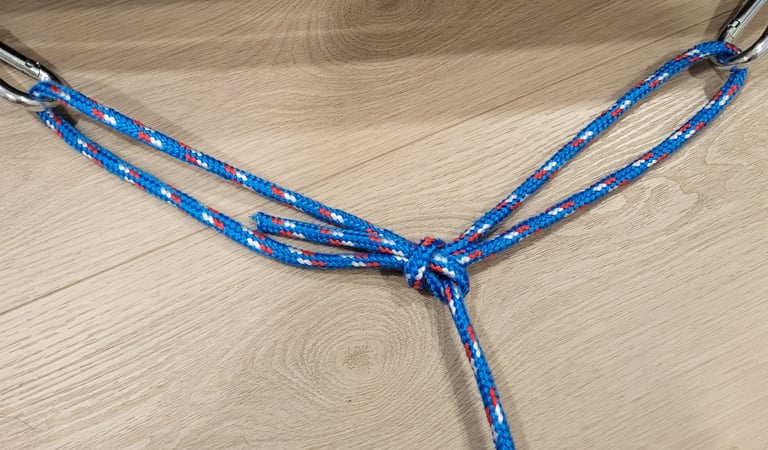
Identifying an Incorrect Portuguese Bowline
If your knot doesn't look quite right, check the exit point of the rope. An incorrectly tied Portuguese Bowline often has one specific flaw:
Tail Placement: Look at where the tail end of the rope exits the knot. If the tail exits on the outside of the main loop, it is tied incorrectly.
The Fix: If you see the tail on the outside, untie the knot and focus on the initial loop. You will need to twist the loop in the opposite direction before threading the tag end through.
Visual Check: A properly finished knot should have the tail end secured on the inside of the loop structure, mirroring the security of a standard Bowline.
Closing the Loop
Now that you've mastered the Portuguese Bowline, go check out the close cousin of this knot, the Running Bowline. You can use it to easily tie off to a large pole or column, cinch down an unruly bundle of pvc conduit, or make a quick tether for your hand tools.
Safety Disclaimer: ⚠️ Material Handling Only
The knots and techniques demonstrated on this site are intended strictly for material handling, wire pulling, and equipment securement. > Never use these hitches and knots for life safety, fall protection, or overhead lifting of loads where a failure could result in injury or death. Always use OSHA-compliant, load-rated hardware (harnesses, shackles, and slings) for critical lifts. Your safety team is there for a reason—consult them for high-risk tasks. Master the craft, stay out of pinch points, respect the load, and live to tie knots another day.
Questions or tips? Reach out anytime. I would love to hear about new knots and techniques.
Check out my YouTube channel for knot tying, rigging tips, and other electrician related tutorials.
© 2025. All rights reserved.
I made this website by myself with Hostinger Website Builder. Try it and start building your idea, today.