Fisherman's Knot - A Reliable and Simple Bend
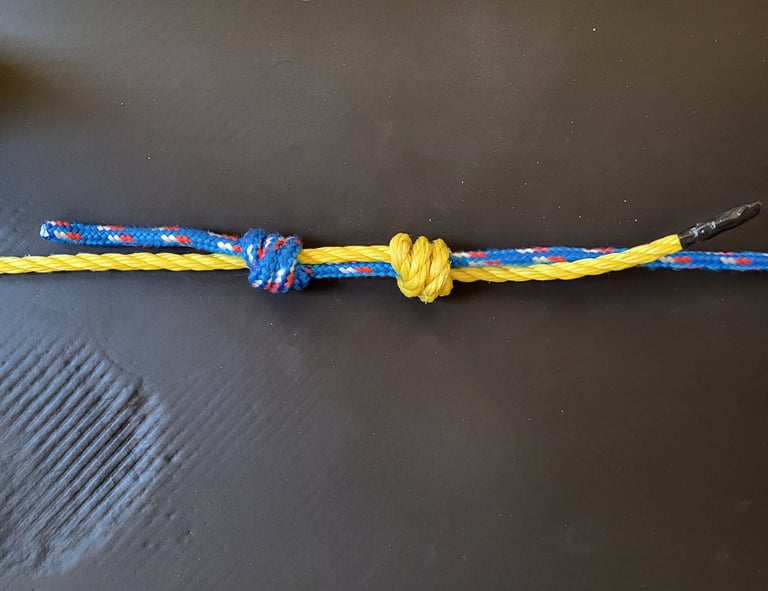
The Fisherman’s Knot is a quintessential bend, prized by professionals for its reliability and straightforward tie. It is important to distinguish this from the Fisherman's Bend (also known as the Anchor Bend); while the latter is a hitch used to fasten a rope to a ring or terminal, the Fisherman's Knot is a true bend, designed specifically to join two rope ends together. While primarily known for its simplicity, it is an exceptionally effective way to join two ropes of similar or even dissimilar diameters. Whether you need to extend a line for a long wire pull or create a secure, permanent loop, this knot provides a compact profile that resists slipping under tension. It serves as the foundation for more advanced variations, offering a dependable connection that is easy to inspect at a glance.
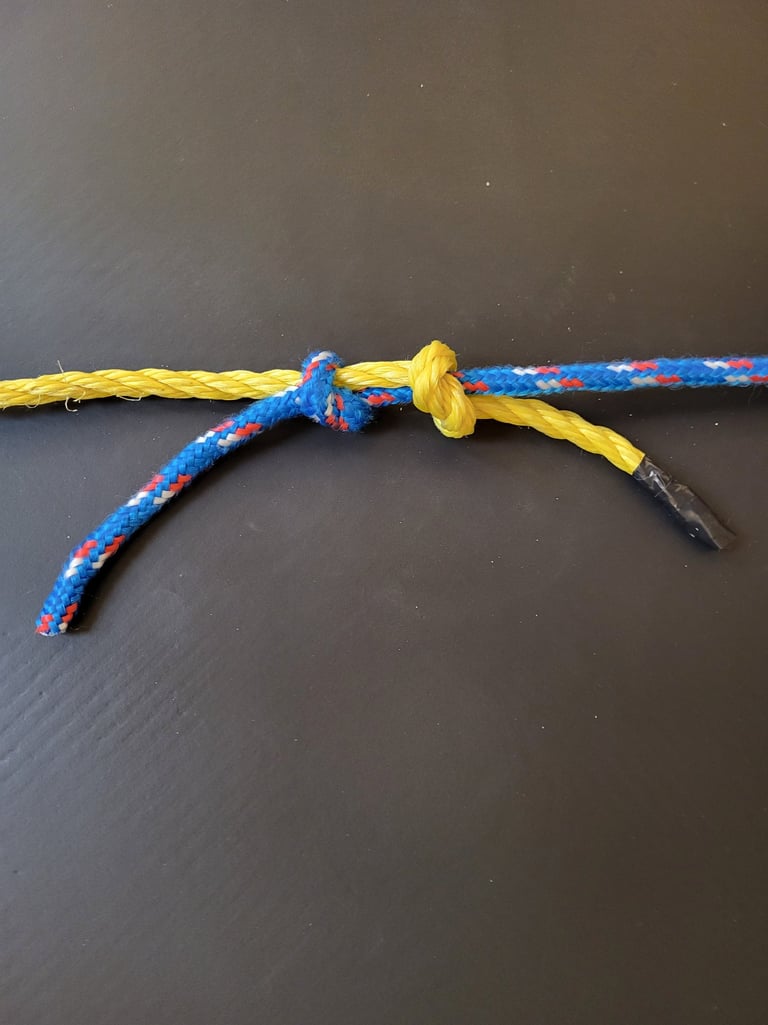
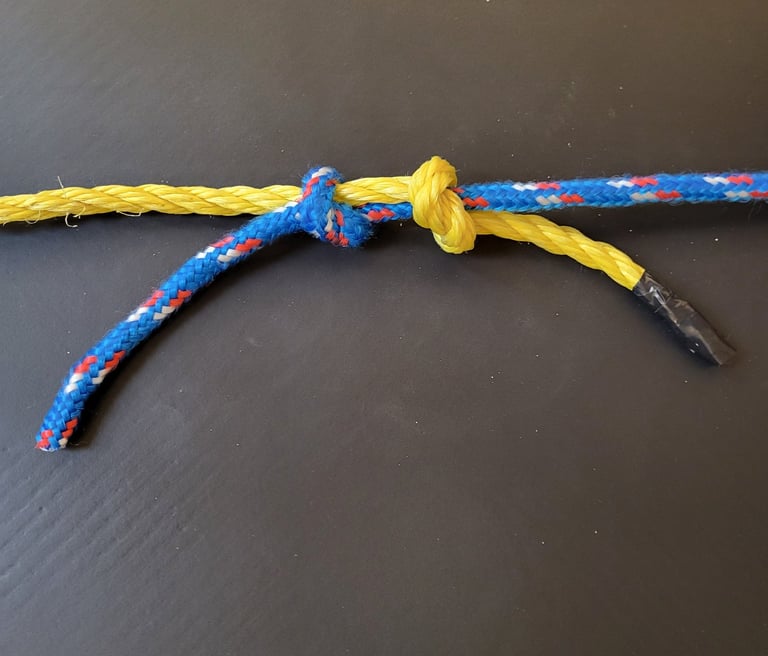
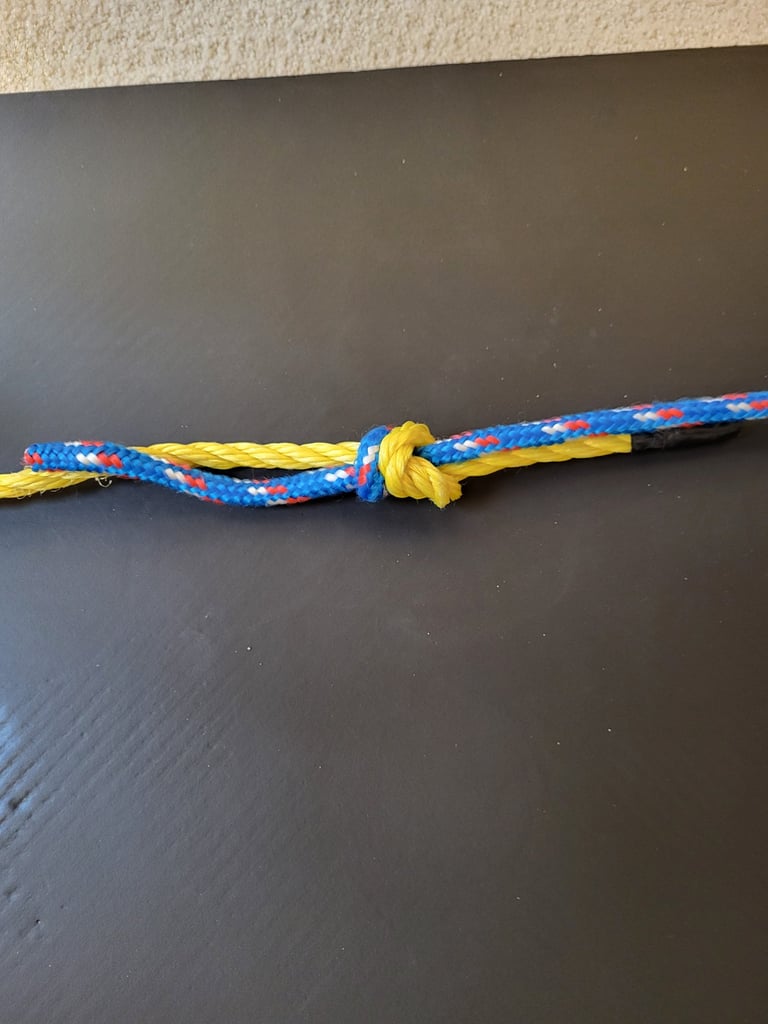
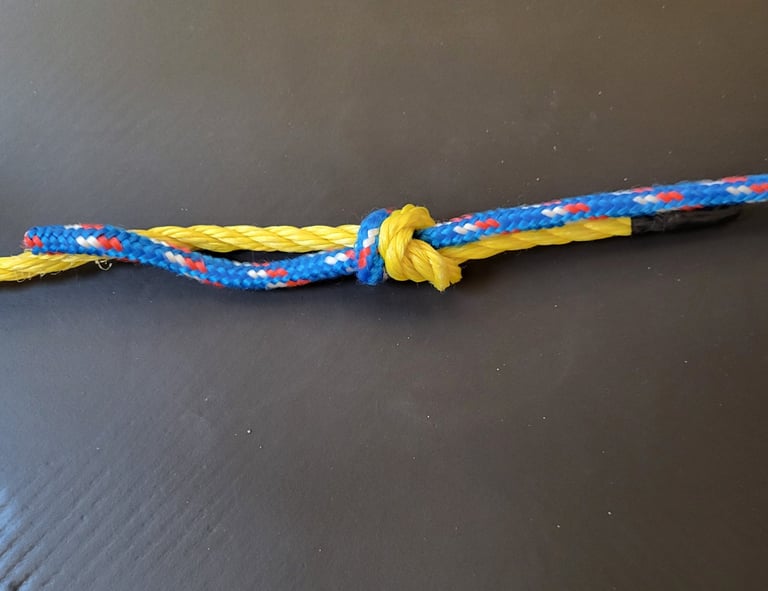
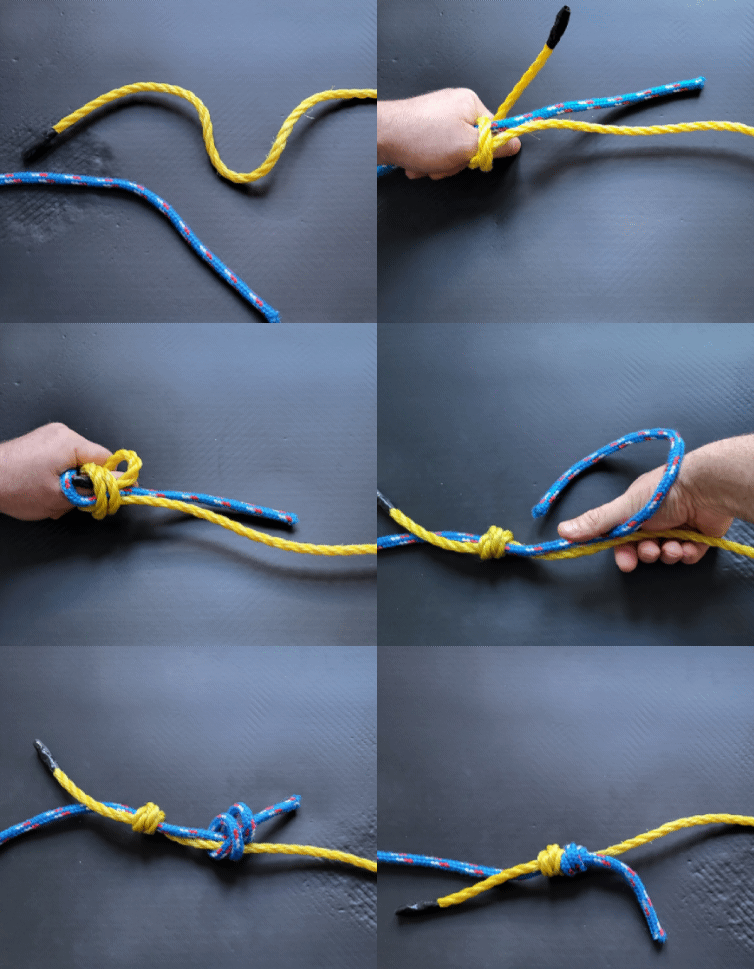
How to Tie a Fisherman’s Knot
Step 1: Position the Ropes Lay two rope ends parallel to each other, with the "tails" (working ends) pointing in opposite directions.
Step 2: Tie the First Overhand Knot Take the tail of the first rope and tie a simple overhand knot around the second (standing) rope.
Step 3: Tie the Second Overhand Knot Take the tail of the second rope and tie an overhand knot around the first (standing) rope. You should now have two knots sliding on the opposite ropes.
Step 4: Set the Knot Pull the standing parts of both ropes. The two overhand knots will slide toward each other until they jam together firmly.
Step 5: Inspect the "Dress" Ensure the two knots are seated flush against one another. For a Double Fisherman’s, simply add an extra wrap around the standing line during Steps 2 and 3 before tucking the tail through.
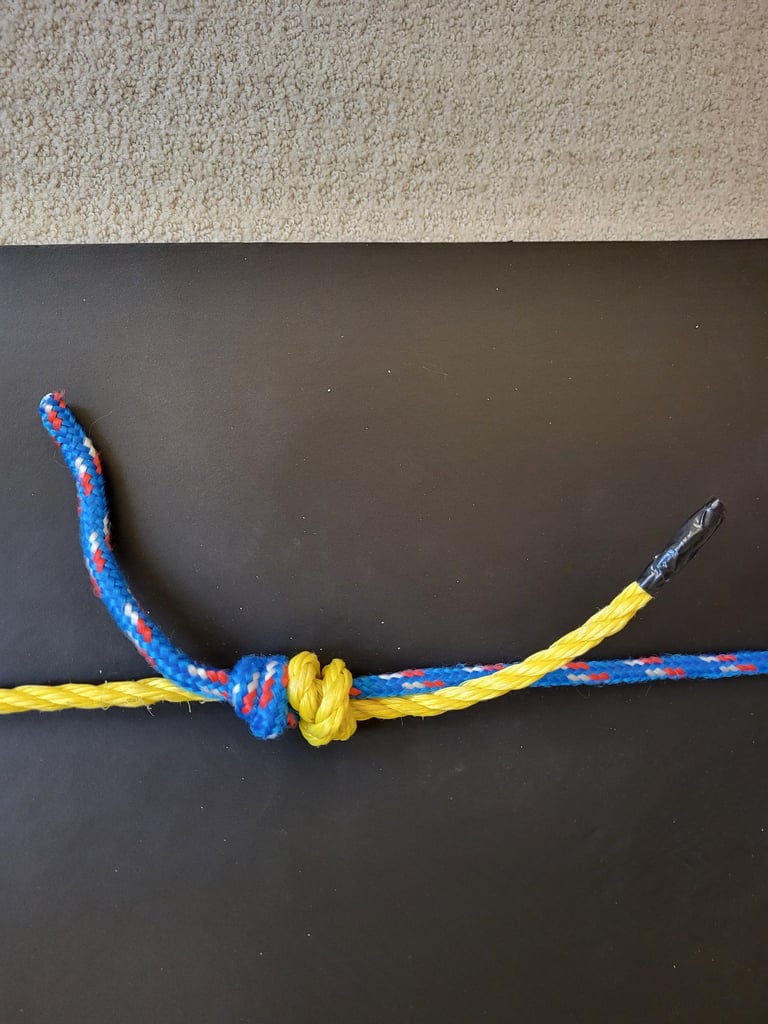
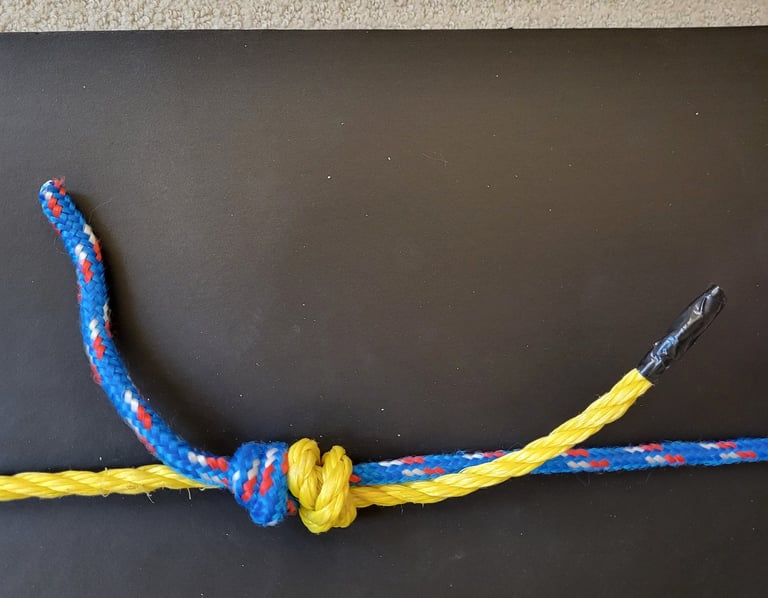
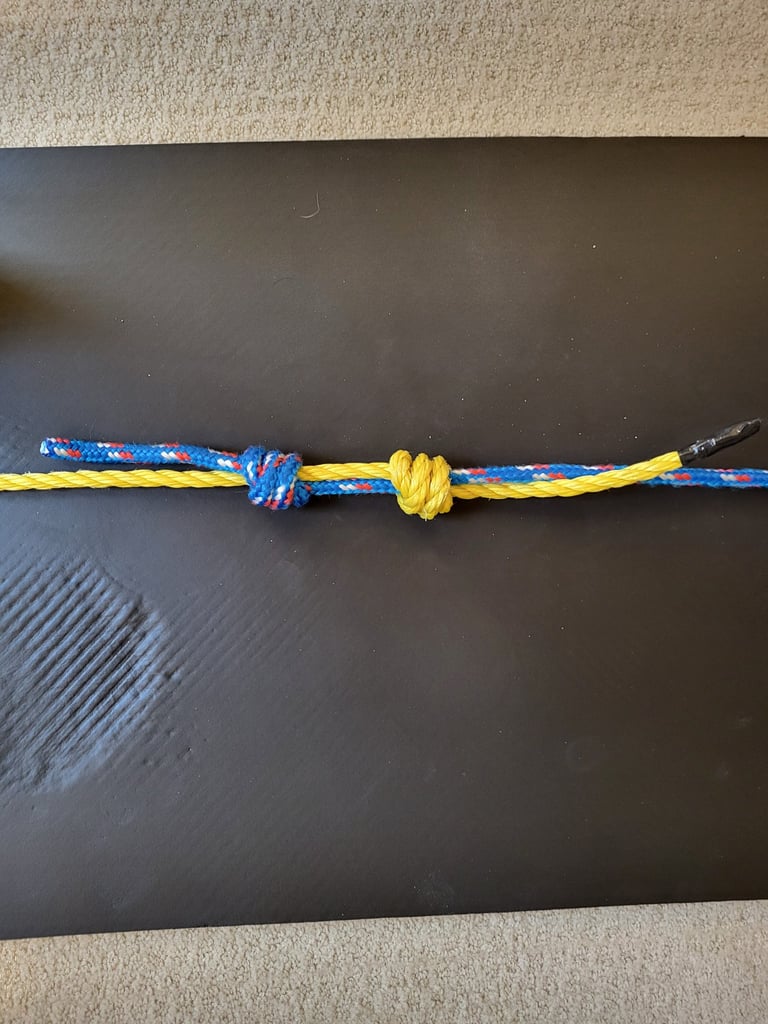
How to Manage a "Welded" Fisherman’s Knot
When this knot has been under a heavy load, like a long conduit pull, the two overhand knots jam together so tightly they essentially become one unit. Use it with discretion, when you a joining ropes that are going to be under extreme tension but you need the ropes to remain intact, another bend like the Zeppelin Bend might be more appropriate.
The "Twist and Push" Method: To break the set, grab the ropes on either side of the knot and push them toward each other while twisting the knot body. This can sometimes create just enough slack to get a fingernail or a marlinspike into the first loop.
The Hammer Tap: For extremely tight knots in stiff rope, laying the knot on a flat surface and lightly tapping it with a hammer (or the handle of your linesman pliers) can help compress the fibers and break the friction lock.
When to Cut: In some cases, especially with smaller diameter poly-line, the knot may be "welded" permanently. If you’re at the end of the pull, it’s often safer and faster to simply snip the knot and re-tie for the next task.
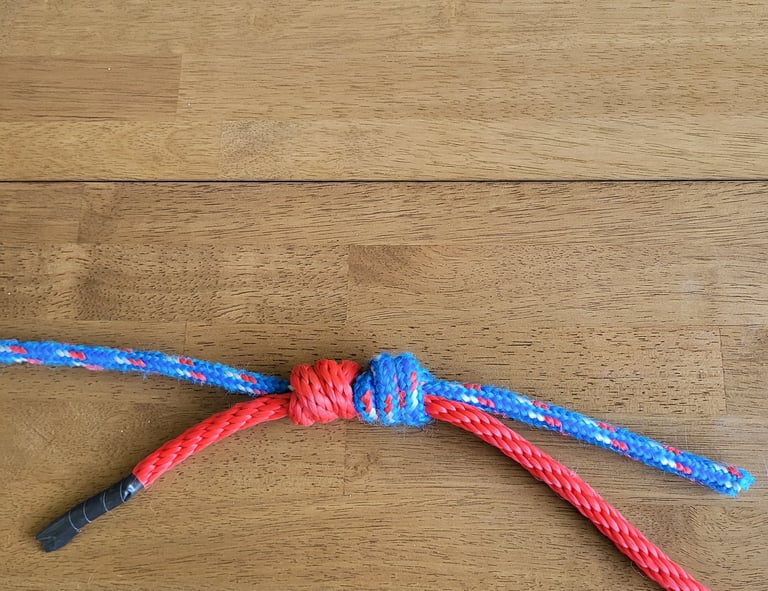
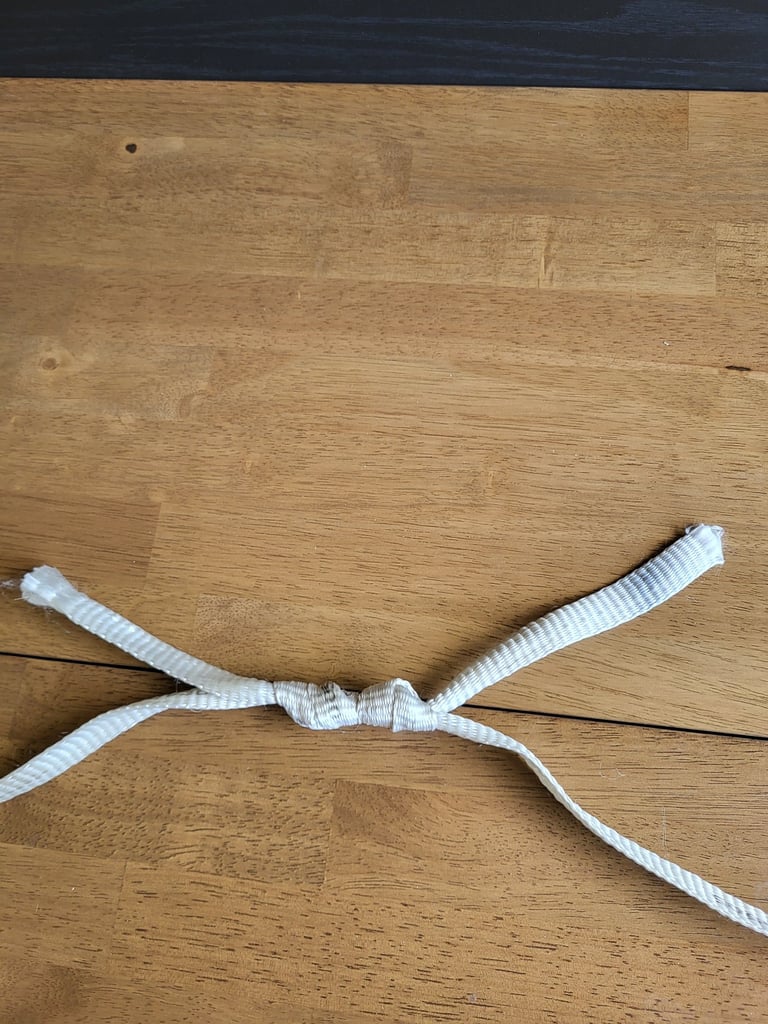
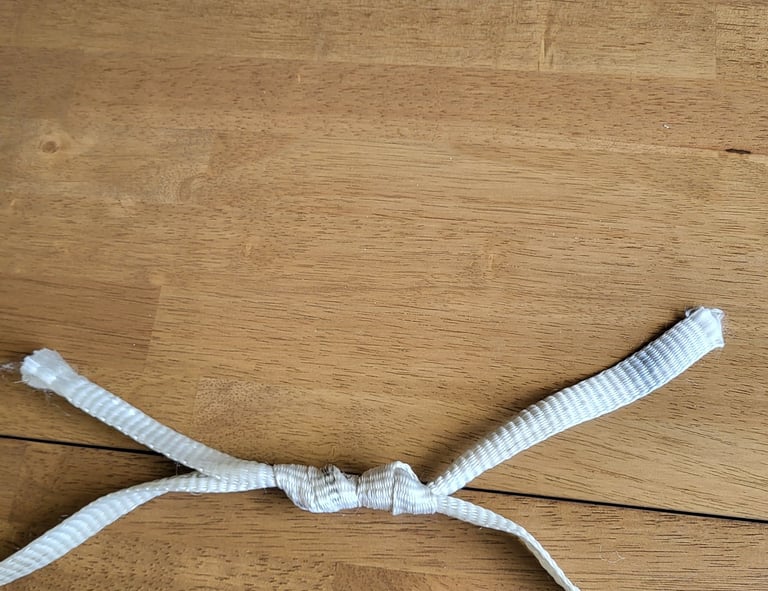
The Double Fisherman’s Knot
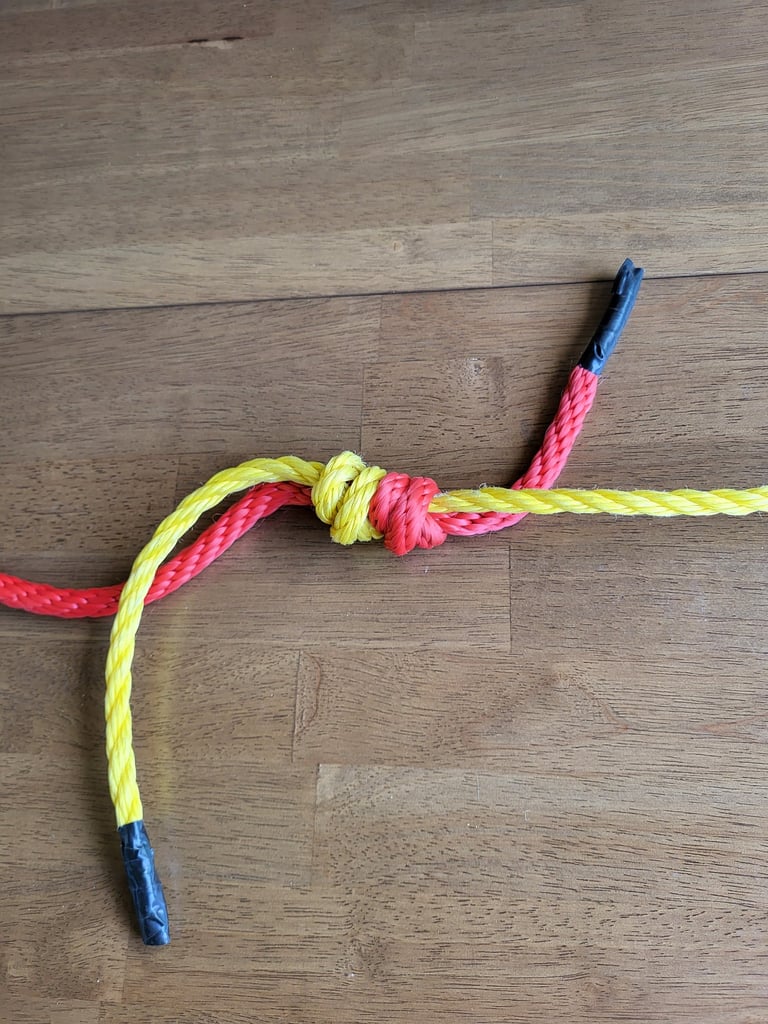
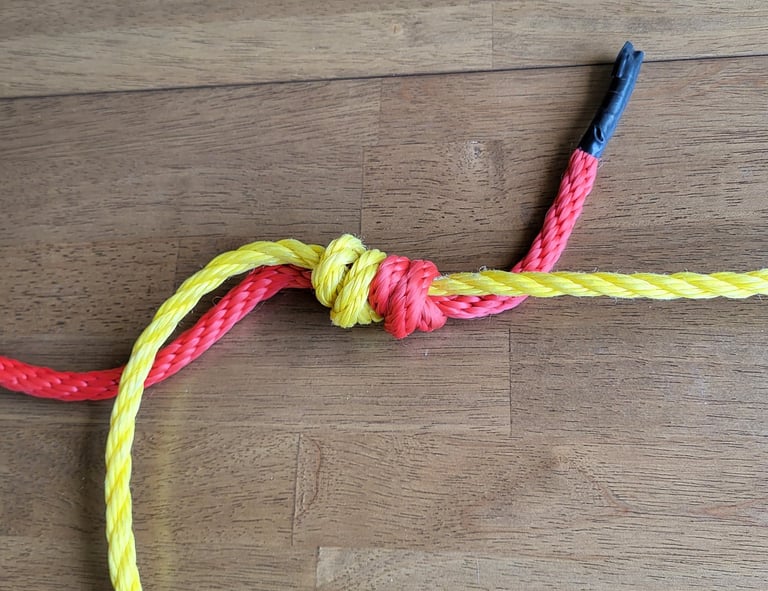
This is the most common version used in the field. By adding a second wrap around the standing line, you create a much more secure "barrel" shape.
Best for: Standard nylon pulling ropes and general construction use.
Why it works: It’s significantly more secure than a single overhand and won't shake loose even if the line goes slack and then snaps under tension again.
Making a Useful Loop
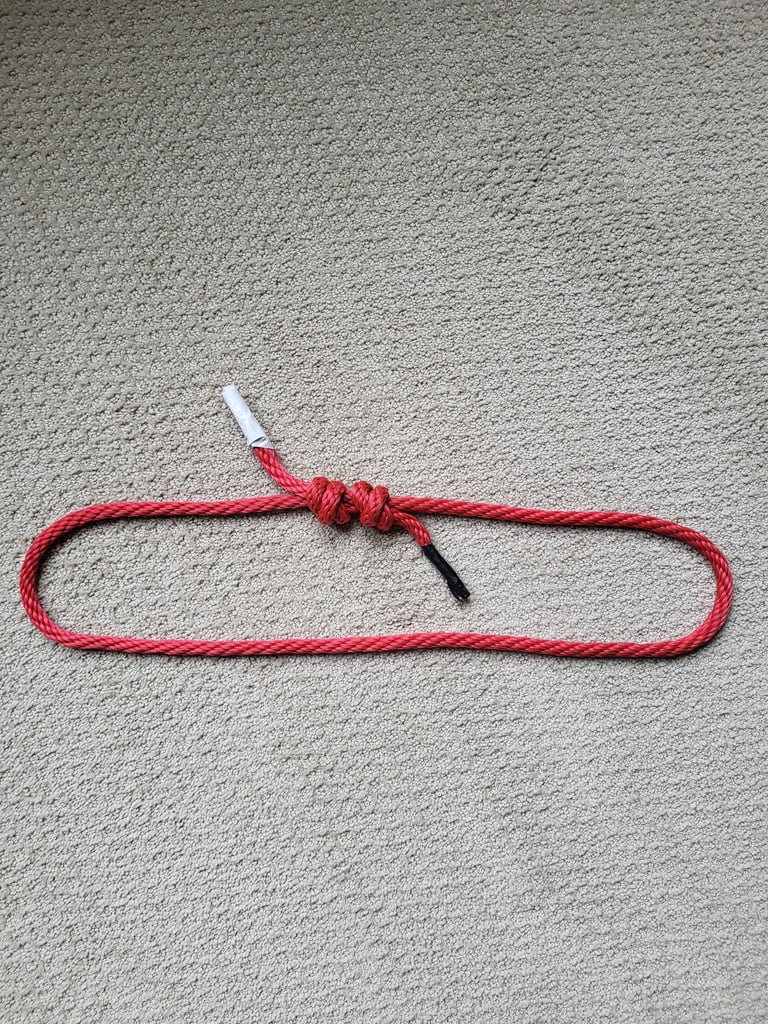
Beyond joining two separate lines, the Fisherman’s knot is the premier choice for creating a high-strength closed loop of rope. This "endless loop" is a critical component for several rigging applications in the field:
PVC Pipe Girth Hitch (Cow Hitch): By closing a loop with a Double Fisherman’s, you can choke the loop around a section of conduit using a Girth Hitch. This provides a non-slip handle or pull point that allows you to gain leverage when sliding PVC pipes together or stabilizing a vertical run.
Prusik Loops and Sliding Tie Points: An endless loop is the foundation of the Prusik Hitch. When wrapped around a larger diameter pulling rope, it creates a sliding tie point that grips tight under tension but can be easily repositioned when the load is released. This is incredibly useful for creating adjustable "come-along" points or secondary safety anchors during a complex wire pull.
Since these loops are often under extreme tension, using the Double Fisherman's ensures the loop won't pull apart, even if the rope is slick or wet.
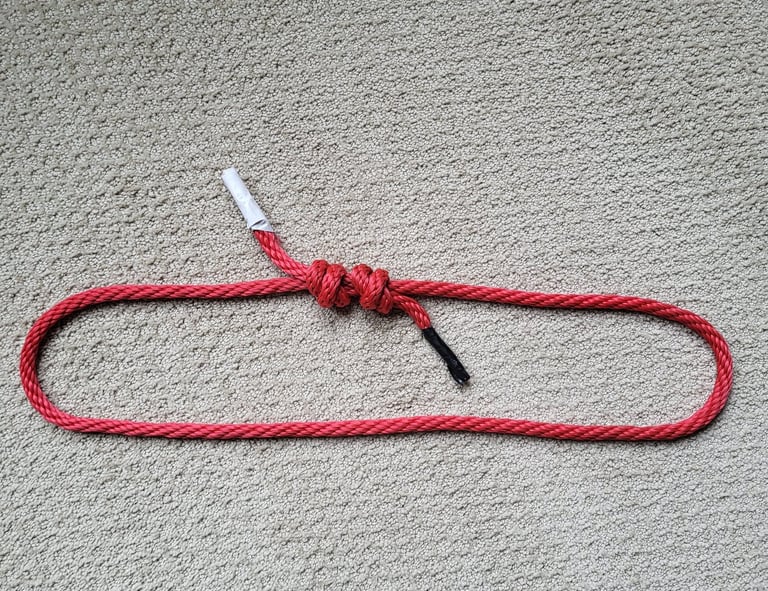
Choosing the Right Bend for the Job
While the Fisherman’s knot family offers unmatched security for permanent or semi-permanent joins, it is famously difficult to untie once it has "welded" under load. If your application requires a join that remains easy to break down after a heavy pull, consider using the Zeppelin Bend, which is just as secure but won't jam. Alternatively, if you are working with ropes of significantly different diameters or need a quick, temporary connection, the Sheet Bend is the industry standard for speed and versatility. Selecting the right bend not only ensures the success of your pull but also saves you the hassle of reaching for your side-cutters at the end of the day.
Pro-Tip for Electricians
Use your thumbs! This knot can be tricky to keep straight, especially with the double and triple variations. Just like I show in the GIF, making the wraps around your thumb or index finger is an easy way to keep everything aligned.
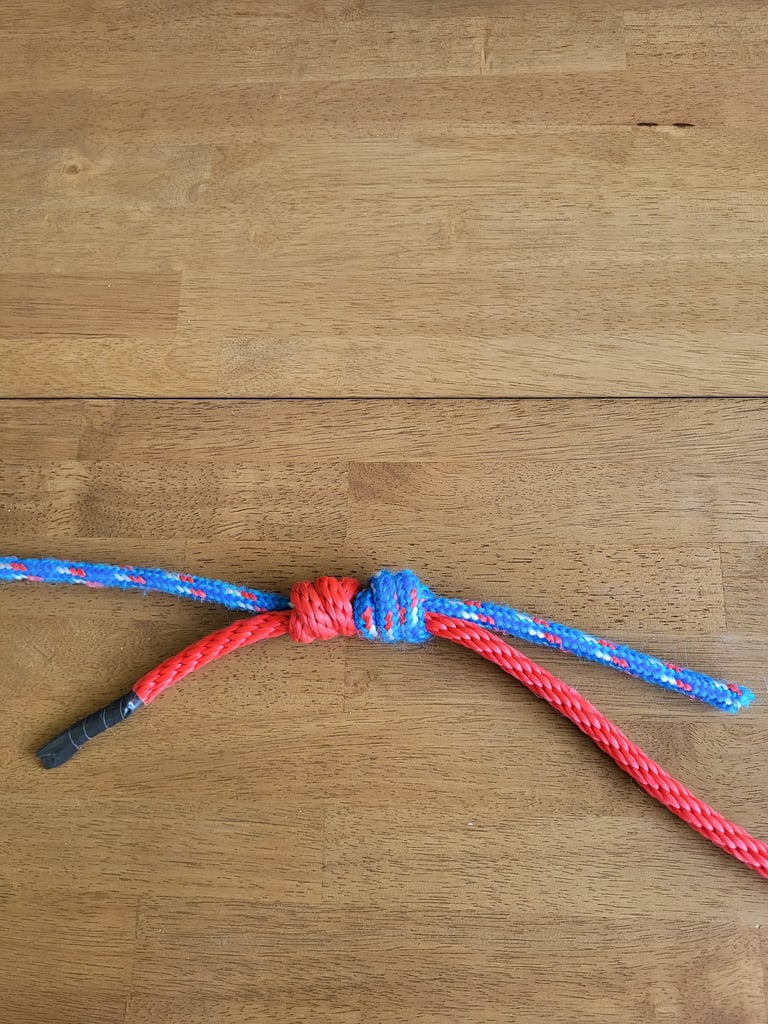
The Triple Fisherman’s Knot
In high-voltage work or heavy industrial pulls where you are using thin, ultra-slick twine or high-performance polyethylene (HPPE) lines, the Triple Fisherman’s is the gold standard.
Best for: Extremely slick synthetic lines, small-diameter "jet-line," or when the join is intended to be permanent.
Why it works: The third wrap provides a massive increase in friction. If a Double Fisherman's is "secure," the Triple is "locked."
Note on Bulk: Keep in mind that as you move from a Single to a Triple, the knot gets physically larger. If you are pulling through a tight 1/2" or 3/4" conduit, a Triple Fisherman's might snag on a bend where a Single would have slid through.
Comparison at a Glance
When to Use Double and Triple Variations
While the standard Fisherman’s knot is a great quick-fix, the Double and Triple versions are the industrial standards for synthetic materials. As you add more wraps, you increase the surface area and friction, which prevents the "slippage" common in slick, plastic-based ropes.
Safety Disclaimer: ⚠️ Material Handling Only
The knots and techniques demonstrated on this site are intended strictly for material handling, wire pulling, and equipment securement. > Never use these hitches and knots for life safety, fall protection, or overhead lifting of loads where a failure could result in injury or death. Always use OSHA-compliant, load-rated hardware (harnesses, shackles, and slings) for critical lifts. Your safety team is there for a reason—consult them for high-risk tasks. Master the craft, stay out of pinch points, respect the load, and live to tie knots another day.
Questions or tips? Reach out anytime. I would love to hear about new knots and techniques.
Check out my YouTube channel for knot tying, rigging tips, and other electrician related tutorials.
© 2025. All rights reserved.
I made this website by myself with Hostinger Website Builder. Try it and start building your idea, today.